Wednesday, 23 February 2011

First tutorial: 50's inspired

Ok Ive been promising a tutorial for a while now and Ive been nervous to start doing them just because:
a) Im not sure Im good enough
b)my makeup never photographs very well and
c) I dont even know if you guys are interested
so I thought Id start out just by taking photos of the make-up I did on myself today (Im trying out a new style since I turned 25 and I think Im liking it - a bit 50's inspired, probably bought on by my new love of Soap & Glory, I love the images on their packaging). I also used a lot of the products Im going to be reviewing this week so keep your eyes peeled for the reviews but for now heres a step by step tutorial.

So feel free to follow this step by step to create your own 50's inspired look.

I hope you enjoy it, let me know  if you like it and if there are any looks youd like me to include in my future tutorials e.g celebrity looks, film/theatre looks, fashion looks etc etc.

Here goes.

Before I put my makeup on every day I cleanse my face and moisturise. These are 2 steps I never skip ever. At the moment Im using Ponds Hydranutrivita Moisturiser because my skin is still reovering from the cold winter weather and is quite dry.

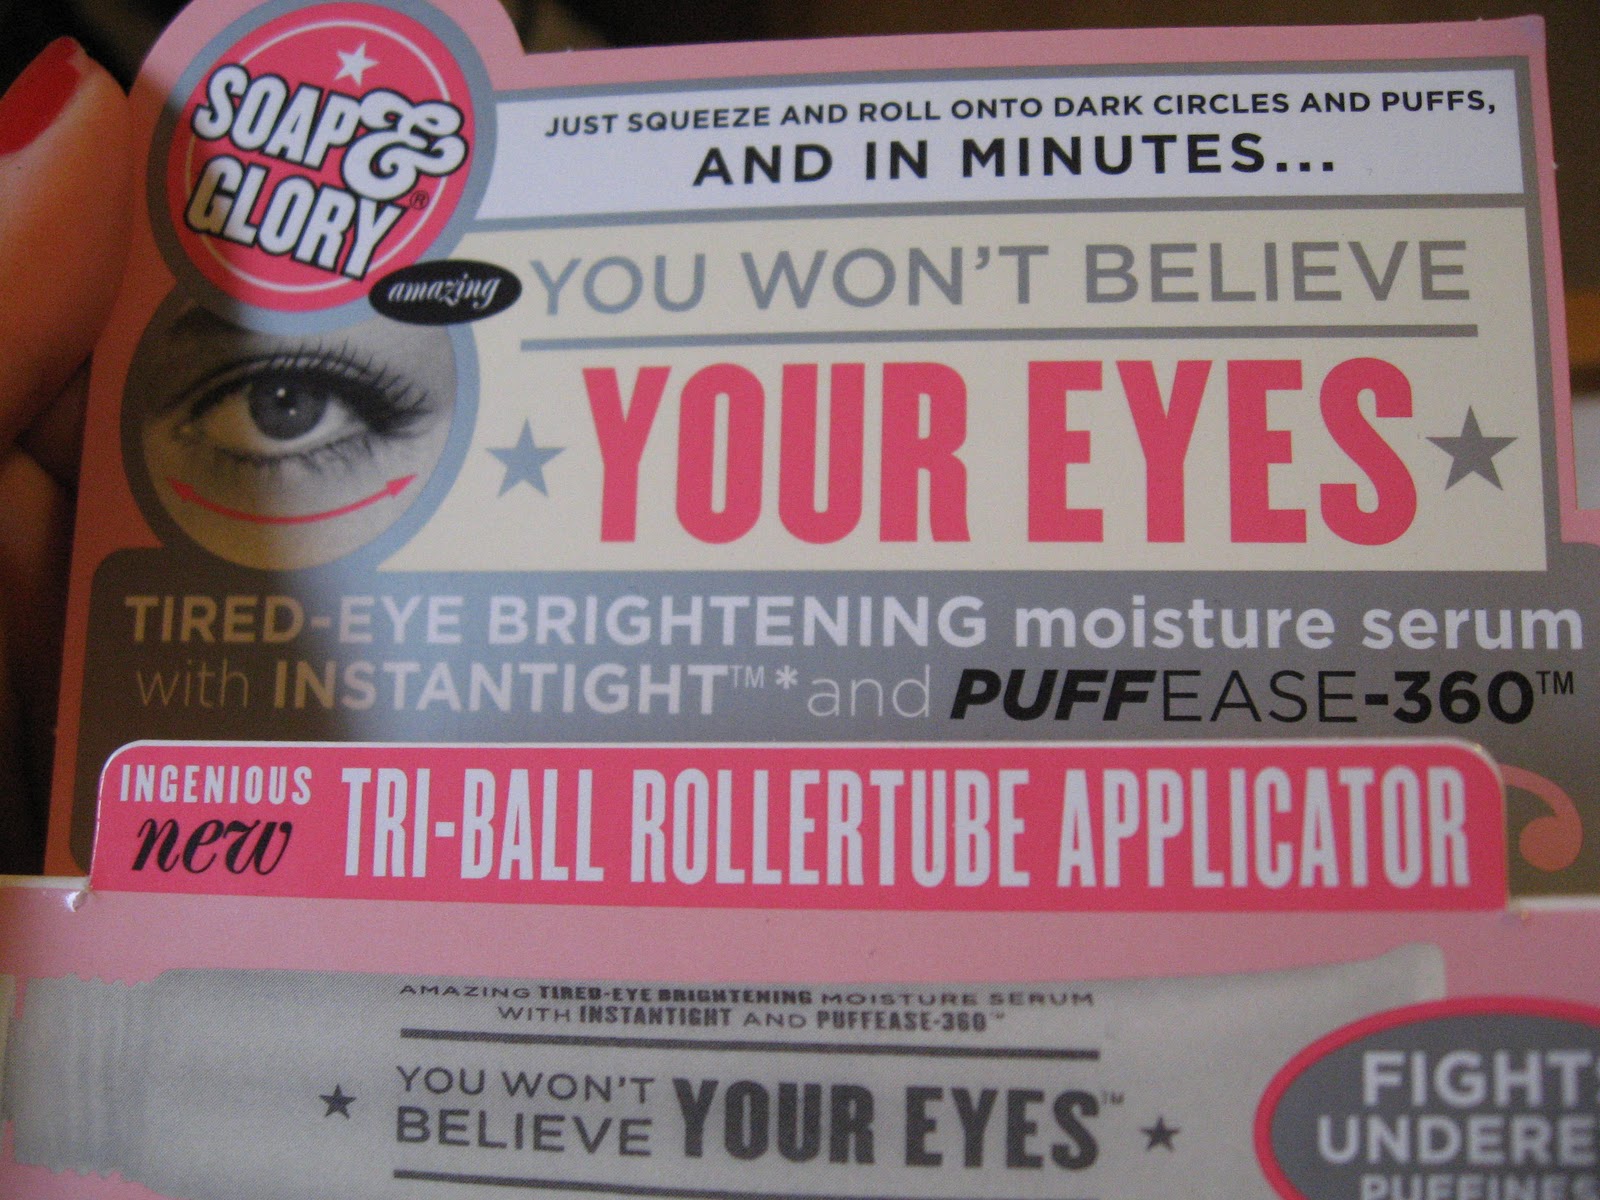
After moisturising I usually apply some of Benefits "The porefessional" which is a pore minimising primer but today I skipped that step as I was rewiewing as I was going. My first step today was to apply "you wont believe your eyes" by Soap  Glory under my eyes.
I applied this with the applicator and then I patted it into my skin with a clean finger as it didnt sink in very quickly on its own.

I then applied foundation. Todays foundation was from a Tester of Clarins Skin Illusion Foundation. I always apply from the nose outwards and I apply with clean fingers for easier blending. Remember your face doesnt stop at the jaw, you dont want tide marks. I always blend the foundation under my jawline and blend it out into my neck so it fades into the colour on my neck and chest especially if its a bit darker than usual like this one.
(I would usually use a Max Factor foundation and maybe mix 2 shades together to get a colour match).
This shade was actually slightly dark for me but I loved the texture and coverage. (Just ignore the fact its a bit dark).
Heres a close up after application.

I always apply concealer AFTER foundation. Sometimes the coverage of the foundation alone is enough to hide any blemishes but today I used an under eye concealer (rimmels "Recover" anti fatugue concelar) and a product I dont usually use (Benefits "it stick") which I thought would be best for concealing around the nose and to highlight a couple of areas as it was lighter than my foundation.
I blended the concealer with a clean finger. Under eye concealer should be patted into the skin not dragged or wiped.

Then I set with powder. You can use a translucent powder, but I prefer to use a slightly coloured powder which matches my foundation. I tend to just sweep this onto the nose and outwards onto my chin and forehead, anywhere I dont want too much shine. I tend to miss out my cheeks as theyre going to have blush on them anyway. Powder will set any concealer youve applied and take away any unwanted shine.


I then apply blush. The colour will depend on what look Im going for. If I want sculpted cheeks I go for a brownish blush just underneath the cheekbone, quite often I will go for quite a bronzed cheek to add a bit of colour but the colour I wear more than anything is a pink tone. I actually love Rimmels range of blush (notice how Im not using any of my fancy kit products, just my every day cheap makeup)
This is a nice one, its actually got quite an irridescent light pink which gives a bit of shine to my cheeks. This is what I decided to wear today, just lightly swept up onto my cheekbone to add a hint of colour.
Time for eyes. I always start with the lightest colour. Its weird because when I do other people's makeup I start with the darkest and blend out to the lightest. But anyway I started with a matte white shadow all across my eyelid and up onto my brow bone applied with a really soft fluffy shadow brush which Ive had for years and years and never lets me down, its the best for applying base colour.
Then I applied a matte dark brown shadow from the lashline to the crease, really pushing it into the socket to get a defined crease. You can then blend this a bit more using the brush you used fro the white shadow. This just softens and blends the edges a bit.
Then the same brown underneath the eye, just along the lashline with a liner brush.

This is a Ruby and Millie square brush for lining. Its not the easiest for lining but Ive sort of gotten used to it. I only ever use it for lining with shadows. Just adds a bit of extra definition around the eye.

If Im not doing a dark dramatic eye, I line my waterline with white eye pencil to brighten and open the eye. I use this quite a lot on brides for the same reason.
Because I wear glasses I find it's important to define my brows and frame my eyes.
Ive tried a few different products, brow gels, brow pencils etc etc but I always find myself going back to brown shadows applied with a stiff angled brush. Im using a GOSH angled brush here which I love for brows.
Here (hopefully) you can see the difference between an un-defined brow and a brow thats been defined with brow shadow.
And here are my 2 brows all finished and defined. Its also important to say that I tidy up my brows and pluck any stray hairs before I start my makeup.

 For that classic 50's look, you need a sweeping black eyeline. Theres plenty of different products out there; powder, pencils, gel liners, liquid liners. I love gel liner but for this style I think the liquid liner works the best. It can be a bit tricky and does take a bit of practise, maybe youll need to tidy it up afterwards and its always hard getting both eyes to match too so just practise your winged liner.
Take your time, apply with a steady hand. Your flick needs to flick upwards to open the eye and I find it useful to do the flick first with my eye open so I can carry on the line of my lower waterline at the same upward angle (if that makes sense). Once Ive got the flick I close my eye and line from the outside in. This is just the easiest way for me, you may find your own way.

So its all starting to come together nicely. We have the neautral shadows, the strong defined brows, the winged liner. Time to apply mascara. Its totally up to you how much you apply. The classic 50's look proabbly would have been quite minimal or only on the upper lashes but I love mascara so I applied quite a lot of it especially because my lashes at the moment are quite sparse and short :(
Thats the eyes sorted. For the 50's inspired look the lips are also very important, quite a defined cupids bow and a very sultry, pouty look. Lots of people probably associate the glossy red lip with the 50's style which I love but I tried to tone the lips down a bit as it was during the day and I was only leaving the house to pick up the boyfriend which I didnt think was an appropriate use of the glossy red lip.

Sooo..........I used another Soap & Glory product called Marvelips which has 2 ends. One end is colour, the other end is highlighter. It advised you to apply the colour first then use the highlighter in the middle of the lips afterwrds but I tried this and it didnt work for me so I applied it in reverse. I coated my lips in the highlighter first which I felt moisturised them a bit. I applied lots of the hightlighter to the cupids bow to accentuate it.
I then applied the colour which was a sort of dark dusky pink, quite a neautral tone which I really liked especially for daytime. I applied most of the colour to the outer edges trying to leave the highlight in the middle for a pouty look.
I took a piccie out of direct light as it wasnt showing the true colour. You can also soo in the middle where ive left a bit of the highlighter showing through. I love this product. Really soft and silky :)
I then decided it wasnt quite bright enough to match my nails and the red in the top I decided to wear so I went over this colour ( i used marvelips as a base) with Models own tangerine lip balm.

I wore this on Saturday over rel lip pencil and it gave a lovely bright pop of colour and a gorgeous glossy silky finish so perfect for a classic 50's look with the bright red lips. But for now I just wanted a brighter pop of colour so I applied a bit of this with a lip brush.

That's it, all finished. Im slowly mastering a 50's style fringe.


I hope you all enjoyed my first tutorial. I just feel like Ive ramble but hopefully Ive made sense and maybe Ive inspired you to create your own 50's inspired looks.

Im quite liking this look, Ive tried it out the past few days, maybe Ill keep it.

Soap & Glory "You wont believe your eyes" review

So it was my 25th birthday on Saturday and my lovely boyfriend bought me more Soap & Glory treats which I am loving at the moment. Im in danger of spending all of my money on this range at the moment.

I received "You wont believe your eyes" which is a roll on eye serum which claims to decrease the appearance of puffiness and dark circles with its illuminating serum.
It has a 3 ball roll on applicator which is really easy to use and a little goes a long way.
I actually dont have much darkness or puffiness (I dont think) so this product probably doesnt produce very visible results but it feels great. My eyes feel more awake, theres a slight tingling, cooling sensation and just leaves my eyes feeling refreshed. Really easy to use, Im sure itll last me ages. I love it.

Here are the products details copied from asos.com where you can buy this product for £9.25. Also available at Boots where theres currently a 3 for 2 offer.

What’s inside?

- AMC: Advanced Moisture Complex plus a cellular booster to help reduce the appearance of under eye dark shadows
- SESAFLASH: skin tightening agents and special illuminators help to reduce the appearance of fine lines and wrinkles and provide a soft focus and brightening effect
- Soothing and cooling concentrated CUCUMBER JUICE and allantoin. 


Here are the pics but like I said, not really any visible results as I dont yet suffer too badly with puffiness or dark circles but it did feel refreshing.
On the left: Without serum On the right: After serum


Ive got more products to review so stay following.

Tuesday, 15 February 2011

more benefit goodies......and baddies

So for those of you who read my other benefit post and enjoyed it....heres more. Ill try to include prices where possible and as usual these are just my views and my opinions. Ive been informed some of these are discontinued but I wanted to review them anyway. Its good practise for future reviews.

First up:
That Gal £21.50 - This is a flaw-diffusing primer which provides a subtle radiance for any skin tone.

I didnt get any good pics of this since there was next to no change in the look of my bare face. It did give a lovely glow to my skin and I felt it evened out my complexion. Liked it but Ive said it before and Ill say it again.....how much?

You Rebel Lite £23.50 - A tinted moisturiser with SPF 15. I already owned You Rebel which is the same thing in a slightly darker shade. It was actually too dark for me and seemed to get darker on my skin and looked streaky :s Quite often I had to lighten it up with some lighter foundation and even then it wasnt great so I was very happy to try You Rebel Lite and its soooooo much better. Heres a swipe of both of them.
you rebel lite on the left you rebel on the right.
 I could wear this on its own and no doubt I will be wearing it over summer or if I ever save up enough to go on my travels. At the moment Im mixing it with my Max Factor foundation just to give it a softer texture and a slightly lighter coverage. The rebel lite on it own is too sheer for my spotty skin. It is quite strongly scented. I cant figure out what it is but its not unpleasant but this does however mean you have to avoid contact with the eyes at all costs. Im fairly careful with it but sometimes it gets a little too close my eyes and they end up streaming.  

Rush Hour £17.50 - a makeover for lips and cheeks apparently.
Hmmm ok so good points:
Lovely soft texture, easy application, long lasting. Its not thick so I found it was less likely to get stuck to my teeth during the day. Felt lovely and moisturising on my lips and I liked the darkish colour.  It doesnt look as dark on the picture.


Bad points:
Looked terrible on my cheeks. Didnt add much colour at all, felt a bit weird putting it on my lips then on my cheeks. I wouldnt use it on my cheeks but I can see how its be handy to have a 2 in 1 product. I just dont think its right but I do love it as a lipstick.

Girl Meets Pearl  £24.50 - Ive been using this as a highlighter but it's sold as a pearly face primer. I dont understand why youd need a totally pearlescent face. It says to mix with your moisturiser but its perfectly fine on its own. Very similar to high beam but less thick and less glittery so I actually prefer this to any other highlighting product in the benefit range. I actually think I would buy this if it wasnt soooo expensive.


 Show Offs! shimmer powders - I looooove these a lot. I havent used them much but I love the colours and the fact that they dont just fade into your skin once applied. Not sure on the price, I think I included it on the last post and I think the lady who sends me these samples actually gave me the price at some point so ill post it if I can find it. I got sent 2 more called Ruby-doo and Meringue. I will deffo be wearing at least one of these when I go out on Saturday for my 25th.
Meringue on the left and Ruby-doo on the right both swiped dry.
I love both of these colours. I think these are discontinued which makes me very sad. I assume theyre similar to the Lust Dusters possibly.

Im undecided about this next product. Benetint priced at £24.50. Really not worth it in my honest opinion. Its a lip and cheek stain which seems to stain everything it comes into contact with. I was sent a small tester pot of it.


Blended onto hand
I hated it on my cheeks, I unfortunately didnt get a picture of this...wish I had. it says to apply 3 strokes and quickly blend with fingertips for a naturally sheer and radiant flush. I was left with a big red blob and stained fingers all day. Not attractive. However, when applied to the lips it created a lovely sheer veil of colour, non transferrable and long lasting. It was lovely, Id use it for bridal as it wont kiss off and would only need minimal touch ups. It did dry my lips a little bit though. Had a lovely floral scent, quite subtle.

Benetint has a little sister called Posietint also priced at £24.50.

I found it to be a completely different product to benetint.  It was thicker, pinker had no scent and worked better on cheeks than it did on lips and it didnt stain my fingers.
Applied to cheeks

I would use this for bridal makeup as a long lasting alternative to blush. I find it works best under foundation. I didnt work at all as a lip product for me as my lips are already quite pinky.

Ok so this isnt a makeup product but I was sent a few skincare products as well and I think the best foundation to good makeup is good skin.
I got sent Dear John a movin' on facial cream.
Priced at £26.50 its VERY expensive for a moisturiser and I certainly think theres products out there that do the same job but for a much smaller sum of money. It smells pleasant and sinks into the skin really quickly leaving it soft and smooth. I actually really like it although the resulting soft hydrated skin is very similar to the resuls I get with the moisturiser I use that costs me about £3 from superdrug.

I also got sent an oil free moisturiser called Do it daily! which I thought was a great name for it although after testing it I never wanted to do it ever again. Ive just finished watching the BRITS so I have to award this one the WORST product award. I think this is one of the discontinued products and I dont disagree with their decision to scrap it.


Oil Free moisuriser with SPF 10. One of the worst things Ive ever put on my face. It says its for all skin types but if I had sensitive skin I think I would have been running to the nearest sink to wash it off. Im combination dry and oily and this made my skin feel like it was burning. It had a very vinegary smell to it which I really didnt like at all, it didnt sink into the skin very well and actually made my oily areas more oily. However, my dry patches did clear up and once the burning sensation has subsided my skin was very soft. I wouldnt buy this even if it wasnt discontinued. God help me if I had got this in my eyes.

Next up is another product I cant decide about. Its called California kissing, no idea of the price.

It has a pleasant minty smell and tastes lovely. Its slightly glittery as you can see. I wouldnt wear this during the day as its quite sparkly, hmm I dont know, maybe I would. Im very undecided about this one, I think Ill use my sample until it runs out.

I do like it, its similar to the silky lip balm in texture and thickness but better tasting which I like since I do lick my lips quite a bit. I love the feel of it on my lips but the thing I dont like is it reminds me of something I used to have when I was very young, some cheap tacky lipgloss from the £1 shop maybe. I think its the colour and the sparkles and the fact its mint scented. It just seems so cheap and childish, Im a bit put off and I prefer my other lipbalms for a fraction of what this would cost.....you cant go wrong with a bit of carmex.

Benefit products I am loving at the moment and would definitely buy if they were half the price:

- You Rebel Lite
- The Porefessional Primer
- Girl Meets Pearl
- Boi-ing Concealer

I hope youve enjoyed this post, there may be more....who knows. Stay tuned, I plan to start doing some tutorials although my camera doesnt always show the makeup off to its best :( If you have any requests for celebrity looks, let me know and Ill do my best.

Friday, 21 January 2011

Benefit Goodies......review

Ok it's been a while since the last blog post, the festive period is very time consuming but im back and I intend to put more effort into my blog this year.
As promised, Ill be doing a lot more product reviews and Id like to kick off the new year by reviewing some gorgeous testers I received  by Benefit. This one is actually quite long due to the amount I got sent and also lots of piccies to give you as much info as possible.
Ill do my best to give the products full names, colour/shade and RRP although I couldnt find the prices for all of them as they dont seem to be on the website :( I can only do my best.
As with any product range, some products I liked better than others and the opinions expressed here are just my own and the products may be different for someone else. I will be scoring the products out of 10 with 10 being the highest mark.

I received quite a lot and there may be more to review in the future. These are the products I received.


I started with clean dry skin and the product I applied first was Porefessional.  Price £23.50 which is sort of typical pricing for benefit. This product is a pore minimising primer and provides a translucent coverage.


 The smell isnt unpleasant, Ive got a thing about how products smell and this was passable. Texture wise its quite thick but very velvety and smooth and is one of the better primers Ive used. It definitely minimised the appearance of pores as you can see in the pictures below and I feel it generally evened out my skin tone and allowed for smooth application of foundation over the top ( I used MAC face and body foundation which Ill review separately at a later date).


I will definitely use it again. It only lost points because of the smell, like I said, not unpleasant but I would have liked a nicer smell. 9/10

I then applied Boi-ing industrial strength concealer in shade 01 which has a RRP of £16.50. It claims to camouflage dark circles, shadows and discolouration without creasing or fading.

Having worn this all day, its actually working very well, no creasing or fading but I dont have very dark circles or much discolouration so I cant say whether it truly is industrial strength but I do think it brightened up my eye area. The texture of this is smooth and creamy and a little goes a long way. I really didnt need to use much at all. I do think its a little over priced but it works for me and is one of the best concealers Ive used. I think ill try to make my tester last as long as possible as I cant see myself shelling out £16.50 for a concealer.
before
after
 For me its a great product but loses marks on the price. 9/10

I then applied the famous High Beam complexion enhancher with a RRP of £18.50. It's a liquid highlighter which claims to add a radiant glow. It is applied to my cheekbone and browbone and is actually fairly subtle.

I also get sent a tester of the lesser known Moon Beam which is a golden illuminator which adds a warm shimmer. I tried this one today and actually preferred its colour and texture. Same price. Here are the swatches straight from the pot.
Highbeam on the left, Moonbeam on the right.

 As you can see, 2 different colours, 2 different textures. Highbeam is a lot thicker and a lot more sparkly than Moonbeam which I found to be thinner and gave more of a warm glow to the skin which I preferred. Again, a little goes a long way. Overall, both products are great just to give the complexiona little lift and a bit of a glow. Still over priced in my opinion so unfortunately they both lose a mark. 9/10

One of my favourite products I got sent was Show Off! loose shimmer powder for eyes and face. I couldnt find a RRP but Ive been informed its around £12. Im not sure how many shades are available. I was sent Sunrise Blush and it looks like this in the pot.
Yeah ok, whats the fuss about? I hear you cry. Well this simple shimmer powder has a secret. When applied it looks like this.
dry on the left, wet on the right.
I applied the swatches dry and wet and theres hardly any difference. The powder has a pinky undertone and looks sooooooooooo lovely. I tried and failed to get a good picture of it on my eye. I applied it over black smudged eyeliner, it looked very pink but it doesnt show up well on my photos so it doesnt seem worth it. Sorry. Minimal fallout. Gorgeous colour. I will use this often. Very impressed. 10/10

Next I applied another well known product Bad Gal Lash mascara in Black with a retail price of £16.50. It is a black mascara boasting about how full and voluminous it will make your lashes.

Hmmm......sorry to disappoint ladies but I really wasnt impressed. For the price tag and the big claims I expected it to blow me away. The large comb felt awkward and it was so big I felt clumsy using it and almost made a mascara mess. I much prefer my cheap Natural Collection mascara at a fraction of the price.
Here are the disappointing results.
No Lash inserts used......unlike the lying adverts.
It gets a 4/10. Ive used a lot worse but I find my cheap one produces better results in terms of volume and length.

I then looked at my lips and thought URGH! what scabby lips, they need a good scrub. I needed to use some Dr. Feelgood lip buffing beads. No idea of the retail price, I think this may have been discontinued.
before
after


So this did a good job. But I didnt like it. It smells and tastes like soap and I think for something that is going on your lips and may possibly go into the mouth, it should at least taste nice. This was HORRIBLE! Granted it did do a good job but I much prefer my Lush sugar lip scrub......much better and much sweeter and you can lick it off when its done its job if you like. yum yum. I give Dr feelgood a 2/10. It did its job but it tasted yucky. no thanks.

After all that scrubbing my lips were dry so I definitely needed to follow up with Dr. Feelgood silky lip balm.
Dont know the price of this product, I think this has also been discontinued and its recommended for use after the lip buffing beads, but Ooh La La! it sure is silky. Lovely lip balm. Gorgeous, moisturised lips in seconds. From scabby to snoggable.


The only downside to this product again is the taste. This was nowhere near as bad as the scrub, but it didnt really taste of anything and since I lick my lips at a lot and end up eating most of the lipbalm, Id like it to at least taste nice. Apart from that, its a winning lip balm. I think this will probably be overpriced (if anyone knows the price please inform me) and there are so many other good lip balms on the market so this one scores 7/10 for me. love the texture but it tastes yack and its more than likely expensive and so not worth it. I am currently using this product and will continue to use it until it runs out but I wont be repurchasing.

Lipglosses are hit and miss. Some are sticky, some taste not so nice, some of them are so glossy they slide off your lips completely. Check out Her Glossiness.
The colour is My people, your people. Ill try to find out the price but as of yet I have no idea. Its a very sheer pink gloss with shimmer particles. I love the applicator, love the name, love the smell and the taste (only slightly flavoured). It goes on really well, I prefer a bit more colour to my lipgloss. Maybe Im just being fussy but I think for the price of the benefit items im allowed to be fussy.
Here is how it looks on.
The shimmer particles are very subtle, thank god because I hate too much shimmer. Its not sticky but it does feel slightly dry on my lips. Ive used a lot worse, but ive also found cheaper and better lipglosses. This isnt a bad product at all. I will definitely continue to use this product but again, due to the assumed high price tag which ive come to expect of benefit, I wont be repurchasing. 7/10

Im glad ive tried these products. Theres maybe only 1 or 2 I would consider repurchasing but I definitely think benefit cosmetics are overpriced (maybe its because I never have any money). I think there are products out there that are better quality for a cheaper price.

My top 3 products definitely have to be:
1. Moonbeam - by far my favourite product
2. Porefessional - a lovely smooth primer
3. Boi-ing - a lovely soft concealer that goes a long way

you might be able to see the slightly pinky shimmer powder on this one.
I hope youve enjoyed my review, remember these are just my opinions of the products.